


How to send email in ASP.NET core?
Hello everyone, as we know that in a web application or in the ASP.NET Core web applications, sending emails is one of the common requirements. In the following article, we will learn how to send emails consisting of attachments using a popular open-source component - MailKit. Let's get started.
Step 1: Add MailKit NuGet package to ASP.NET Core project
MailKit is available in the form of a NuGet package. Right-click on the ASP.NET Core project and click on - Manage NuGet packages. Search for MailKit in the Browse section. The following figure shows the relevant entry from the NuGet package manager:-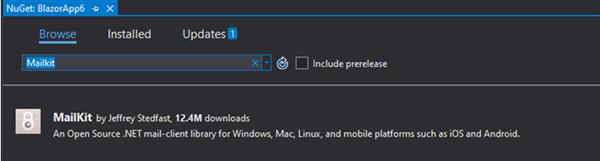
After that, add the following imports in code (it could be either a controller code or any standalone class):-
using MailKit.Net.Smtp;
using MimeKit;
Step 2: Prepare an email message to be sent
Now that MailKit is added to your ASP.NET Core project, it's time to build the email message that we wish to send. An email message consists of several things like - from addresses, to address, subject, message body and so on. Let's begin by adding these.
A message is represented by ‘MimeMessage’ class. The following code shows how the MimeMessage can be configured:-
MimeMessage message = new MimeMessage();

MailboxAddress from = new MailboxAddress("Admin","admin@example.com");

message.From.Add(from);

MailboxAddress to = new MailboxAddress("User","user@example.com");

message.To.Add(to);

message.Subject = "This is email subject";
The above code creates an instance of MimeMessage. It also uses ‘MailboxAddress’ class to build a - from address and to address. The first parameter of the MailboxAddress constructor is the - display name of an email address whereas the second parameter is the email address itself. These can be changed as per own setup.
The Subject property indicates the email subject.
Step 3: Add email body and file attachments
Next, we need to set the message body and optionally add email attachments. The following code shows how this can be done:-
BodyBuilder bodyBuilder = new BodyBuilder();

bodyBuilder.HtmlBody = "<h1>Hello World!</h1>";

bodyBuilder.TextBody = "Hello World!";
Here as you can see, we have used ‘BodyBuilder’ class. It has two properties - HtmlBody and TextBox that contain the email's HTML version and text version respectively.
To attach one or more files to a message, their physical file system paths are required. We compute them using IHostingEnvironment object as shown below:
IHostingEnvironment env = null;
public HomeController(IHostingEnvironment env)
{
    this.env = env;
}
bodyBuilder.Attachments.Add(env.WebRootPath + "\\file.png");
As shown here, we have to attach file.png to our message that resides under wwwroot. Therefore, the IHostingEnvironment object is injected and we’ll use its WebRootPath property to get the physical path. Next, we add the file to ‘Attachments collection’ of the BodyBuilder object that we created earlier.
Once the BodyBuilder is ready, we can generate a MimeMessage body from it as follows:
message.Body = bodyBuilder.ToMessageBody();The ToMessageBody() method creates a message body with HTML/Text content and attachments.
Step 4: Connect and authenticate with the SMTP server
In order to send the email message that we just created, a connection with an SMTP server is required. Security credentials will also be needed to connect with the server. The following code depicts how this connection can be established using an SMTP server:-
SmtpClient client = new SmtpClient();

client.Connect("smtp_address_here", port_here, true);

client.Authenticate("user_name_here", "pwd_here");
Here, we created an instance of the ‘SmtpClient’ class that represents a client to an SMTP server. We call this the Connect() method and pass the SMTP server address and SMTP port. These settings can be used as per your environment. The third Boolean parameter indicates whether the connection requires SSL or not.
We then proceed to the Authenticate() method that authenticates a user account with the SMTP server. This method accepts two parameters - a user name and a password. Change these values to suit your environment.
Step 5: Send an email message
After configuring the SMTP server connection, we can now send a message and then disconnect from the server.
In the above code, Send() message accepts a MimeMessage as a parameter and attempts to send that message. As soon as the message has been sent, we can disconnect from the server using the Disconnect() method. The Boolean parameter to Disconnect() indicates that we want to issue QUIT command to the server. Finally, we Dispose() the SmtpClient object.
Fill valid values for - from address, to address, and SMTP server configuration and then attempt to run the code.
I hope you must have got the solutions. Thanks for reading.

CONTRIBUTE
MOBILE APP
